1. Raise forks to an easy accessible working height (approx. 4 to 6 feet).
2. Decide where you want to mount it to the forklift carriage – left, right, or center. (Center being the most common.) Note: Be sure to leave room to access the battery compartment that way the battery can be replaced without having to remove the unit.
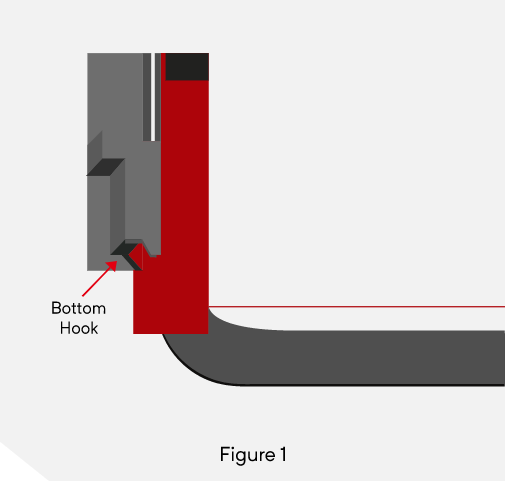
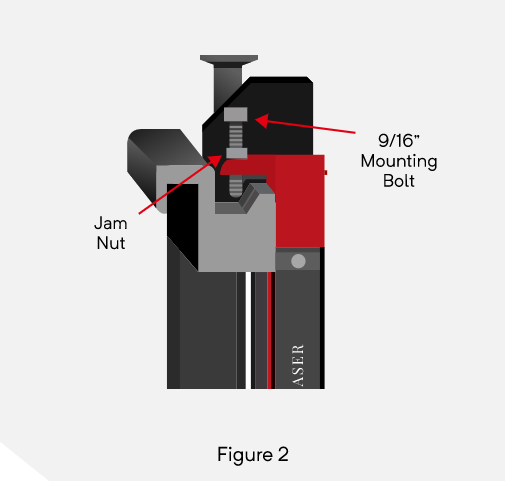
3. Hook the bottom of the Tine-Guide™ housing to bottom of the carriage and push the top up flush against the carriage. [See Figure 1 & 2]
4. Using a “9/16 socket wrench”, tighten the bolts securely down against the groove on the back side of the carriage lip. [See Figure 2] (Note: be sure the unit is plumb.)
5. Tighten jam nuts snugly against top of unit. [See Figure 2]
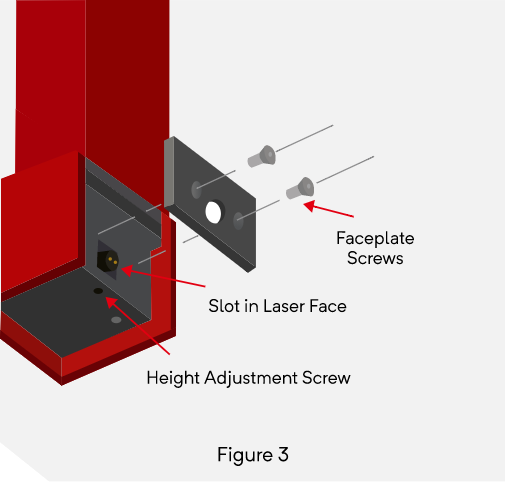
11. The laser may not be level internally. The laser head located on the bottom of the unit [See Figure 3] allows adjustments to be made to both the vertical height and horizontal level of the laser.
- Calibrating: Lay the Tine-Guide box across the end of the forks to visually see the location of the line
- Calibrating: Remove the faceplate using a 3/32″ Allen wrench. [See Figure 3]
- Calibrating: You can now see the laser lens housing (Brass). [See Figure 3] Insert a small thin flat-head screwdriver into the slot in the laser face being careful not to touch the laser’s lens. Now turn the laser left or right to level the laser line.
Note: (You should only have to move the laser a small amount. It may also be hard to turn, but be careful not to slip and damage the laser.)
- Height Adjustment: To adjust laser level, take the 5/64″ Allen wrench and turn the set screw on the bottom of the unit clockwise or counter clockwise until the laser is aligned with the tine tips. [See Figure 3] (Note: You can now adjust the laser level a little above, below or right on the tines, your choice.)
12. Remove the cover from the battery compartment in the Tine-Guide™ housing.
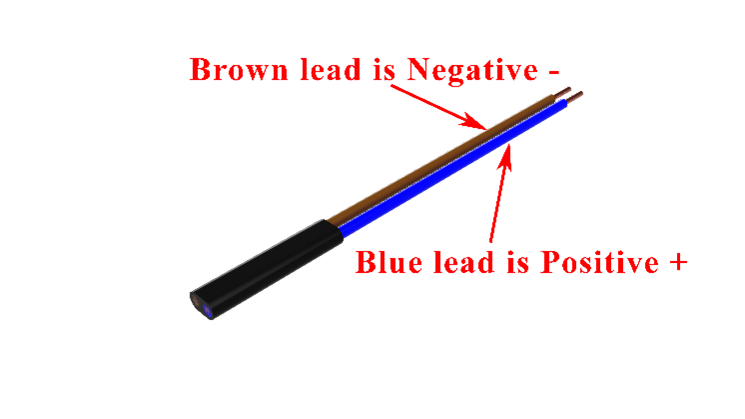
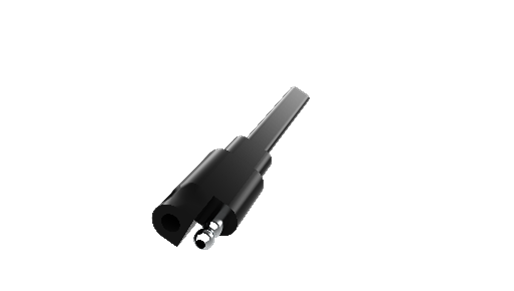
13. Unplug the battery from the unit.
14. Plug the charge into a 110VAC outlet, the LED on the charger will flash red and green indicating the charger is ready.
15. Plug the battery into the connector on the charger and the LED will turn red indicating the unit is charging.
16. The charger will shut off automatically when the battery is fully charged, and the indicator LED will turn green. (Note: Charging time is approximately 8 hours.)
17. Disconnect the battery from the charging unit.
18. Reconnect the battery per the instructions in the Connecting The Battery Section.
Trouble Shooting
1. Any Incorrect Operation: Ensure the unit has gone through proper startup. This process MUST be followed anytime power is removed and reapplied to the unit. Power unit up with forks on the ground, wait for laser to go out before using. (Approximately 3 Minutes)
2. Laser Continually Blinking: Lower forks and allow them to rest on the floor for 20 seconds and then resume operation. If the problem continues, raise the laser unit up to a comfortable height and examine the sonic sensor that is located on the bottom of the unit. Carefully remove any debris that may be lodge around the sensor. After inspection, disconnect the power from the unit and reconnect power after 10 seconds, this will reset the unit, allow for startup process.
3. Unit Remains on at all Times: Raise the forks to their maximum height for 10 seconds and then lower the forks back to the floor. If this does not resolve the problem disconnect the power from the unit and reconnect power after 10 seconds, this will reset the unit.
4. It is normal for the laser to intermittently flash during operation. This is caused by the program processing the rapidly changing date that it is receiving.
5. If these steps do not resolve your issue, please contact our Technical Support at 501-443-3285 (M-TH 8am-5pm CST)
